> ## Documentation Index
> Fetch the complete documentation index at: https://agent-observability-docs.splunk.com/llms.txt
> Use this file to discover all available pages before exploring further.
# Multi-agent banking chatbot sample
> Get started with the multi-agent banking chatbot sample project powered by LangGraph, with RAG using Pinecone
The multi-agent banking chatbot sample project is a demo of a multi-agent chatbot powered by LangGraph, with RAG using Pinecone as a vector database. You can have a conversation with the chatbot, and it will bring back information on your (fictional) credit score, as well as give you details of credit cards available from a fictional bank.
Get the code for the sample project. You can find this project by cloning the Splunk Agent Observability Python SDK repo.
The code for this project is in the `/examples/agent/langgraph-fsi-agent/after` folder.
The code for this sample is available in Python, and you can run this code to generate more traces, and experiment with improving the app based off the evaluations.
The Python version of this app uses Chainlit to host the chatbot in a web UI.
## Evaluate the app
The sample project comes with an Agent Stream pre-populated with a set of traces for some sample interactions with the chatbot - some asking relevant questions, some asking questions unrelated to the banking agents capabilities.
### Investigate the Agent Stream
Navigate to the **Default Agent Stream** by selecting this project, and selecting the **Default Agent Stream** in the dashboard.
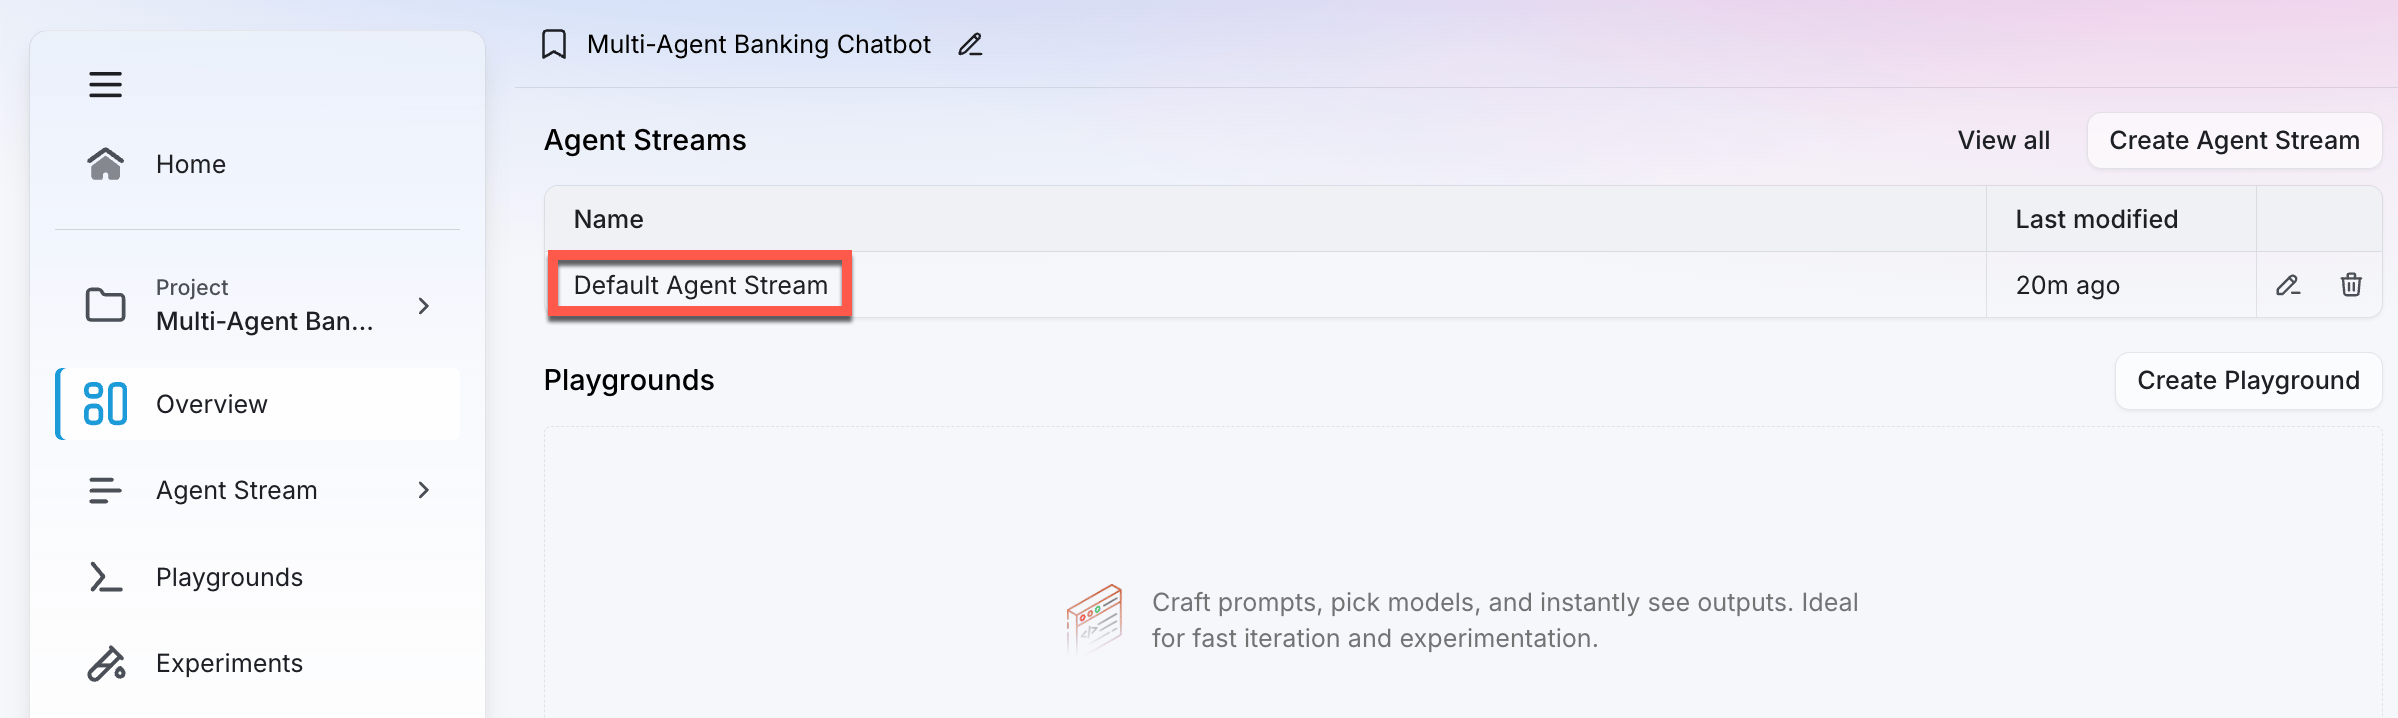 The Agent Stream is configured with the following evaluators:
* [Action Advancement](/concepts/evaluators/agentic/action-advancement)
* [Action Completion](/concepts/evaluators/agentic/action-completion)
* [Tool Errors](/concepts/evaluators/agentic/tool-error)
* [Tool Selection Quality](/concepts/evaluators/agentic/tool-selection-quality)
For some of the traces, these evaluators are scored at 100%, showing the agents are working well for those inputs. For other traces, these evaluators are reporting lower values, showing the chatbot needs some improvements.
The Agent Stream is configured with the following evaluators:
* [Action Advancement](/concepts/evaluators/agentic/action-advancement)
* [Action Completion](/concepts/evaluators/agentic/action-completion)
* [Tool Errors](/concepts/evaluators/agentic/tool-error)
* [Tool Selection Quality](/concepts/evaluators/agentic/tool-selection-quality)
For some of the traces, these evaluators are scored at 100%, showing the agents are working well for those inputs. For other traces, these evaluators are reporting lower values, showing the chatbot needs some improvements.
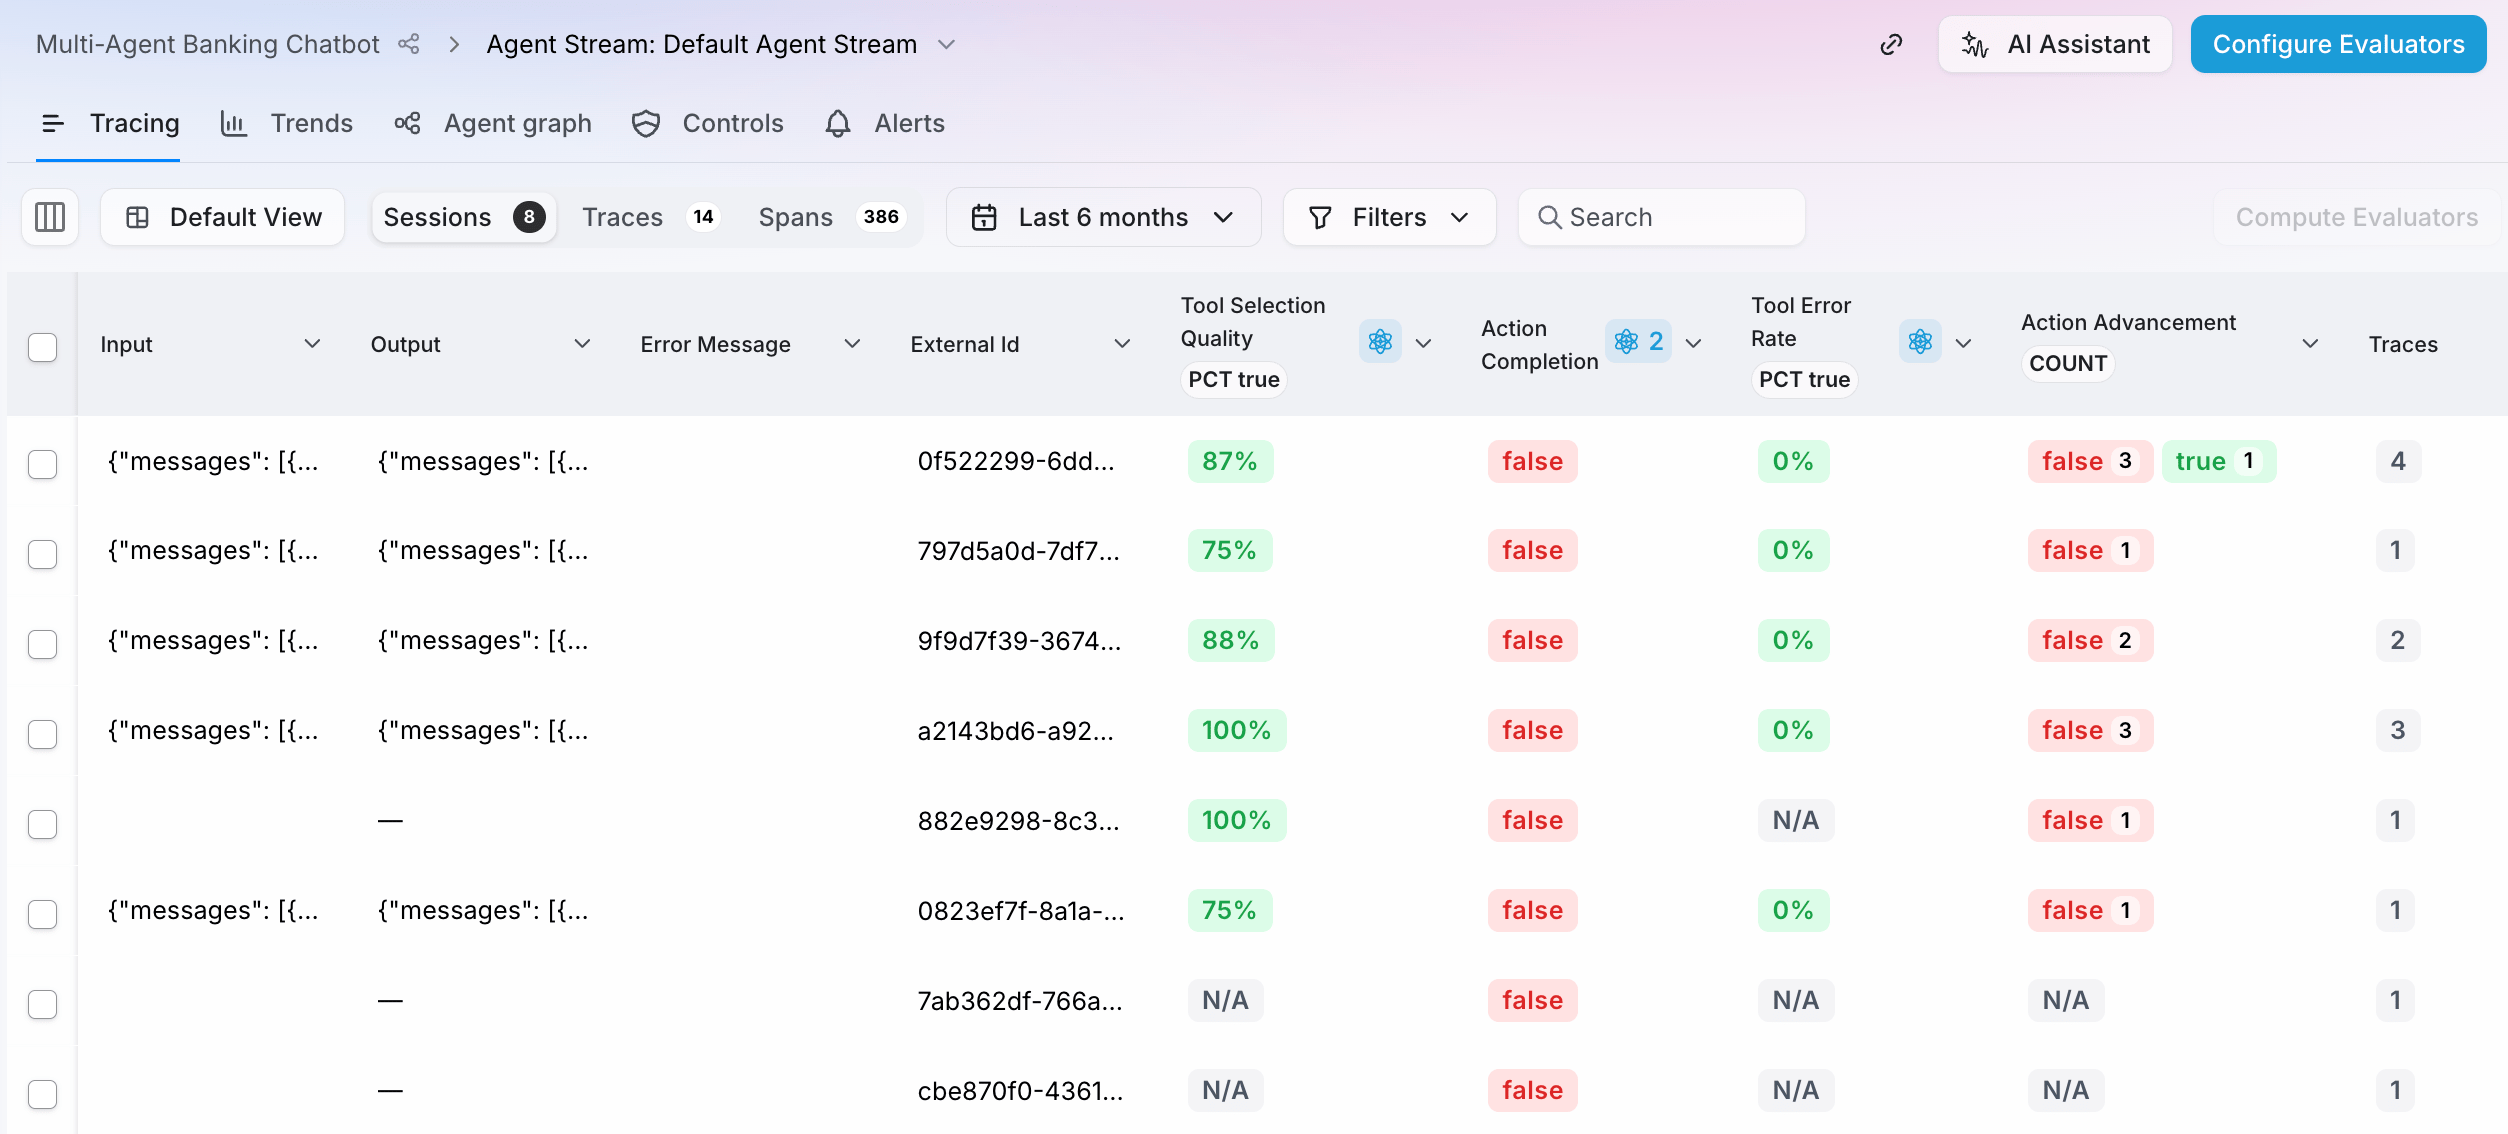 Select different rows to see more details, including the input and output data, the evaluator scores, and explanations
### Get insights
Splunk Agent Observability has an Insights Engine that reviews your traces and evaluators, and gives suggestions to improve your application. To generate insights, select the **Agent Stream Insights** button.
The insights will be generated, and show on a pane on the right-hand side.
Review the generated insights, and think about ways to improve the chatbot by tweaking the agent prompts. The insights will likely have something like this:
> **Summary**
>
> The supervisor agent exhibits inconsistent behavior that undermines the multi-agent system's effectiveness. In a credit score inquiry, the supervisor correctly identified the query type and transferred it to the credit-score-agent, which successfully retrieved the user's credit score (550) and provided helpful context about the score's meaning. However, when control returned to the supervisor, it responded with 'I don't know' despite the specialist having successfully completed the task. This creates a frustrating user experience where the system retrieves the requested information but then claims ignorance, potentially making users think the system is broken or unreliable.
>
> **Suggestions**
>
> Ensure the supervisor agent properly processes and relays the results from specialist agents instead of defaulting to 'I don't know' responses.
To see how you can use these insights to improve the app, get the code and try some different agent prompts.
## Run the sample app
You can run the sample app to generate more traces, and test out different agent prompts.
### Prerequisites
To run the code yourself to generate more traces, you will need:
* Access to an OpenAI compatible API, such as
* An OpenAI API key
* Access to an OpenAI compatible API, such as Google Vertex
* Ollama installed locally with a model downloaded
* A [Pinecone account](https://www.pinecone.io). The free Starter tier is more than enough for this project. You will need your Pinecone API key.
* Either Python 3.10 or later, or Node installed
To get evaluators calculated in Splunk Agent Observability, you will need:
* An integration with an LLM configured. If you don't have an integration configured, then:
In the Splunk Agent Observability UI, navigate to the **LLM Integrations** page by selecting your user profile in the upper-right corner and then selecting **Integrations**.
Select different rows to see more details, including the input and output data, the evaluator scores, and explanations
### Get insights
Splunk Agent Observability has an Insights Engine that reviews your traces and evaluators, and gives suggestions to improve your application. To generate insights, select the **Agent Stream Insights** button.
The insights will be generated, and show on a pane on the right-hand side.
Review the generated insights, and think about ways to improve the chatbot by tweaking the agent prompts. The insights will likely have something like this:
> **Summary**
>
> The supervisor agent exhibits inconsistent behavior that undermines the multi-agent system's effectiveness. In a credit score inquiry, the supervisor correctly identified the query type and transferred it to the credit-score-agent, which successfully retrieved the user's credit score (550) and provided helpful context about the score's meaning. However, when control returned to the supervisor, it responded with 'I don't know' despite the specialist having successfully completed the task. This creates a frustrating user experience where the system retrieves the requested information but then claims ignorance, potentially making users think the system is broken or unreliable.
>
> **Suggestions**
>
> Ensure the supervisor agent properly processes and relays the results from specialist agents instead of defaulting to 'I don't know' responses.
To see how you can use these insights to improve the app, get the code and try some different agent prompts.
## Run the sample app
You can run the sample app to generate more traces, and test out different agent prompts.
### Prerequisites
To run the code yourself to generate more traces, you will need:
* Access to an OpenAI compatible API, such as
* An OpenAI API key
* Access to an OpenAI compatible API, such as Google Vertex
* Ollama installed locally with a model downloaded
* A [Pinecone account](https://www.pinecone.io). The free Starter tier is more than enough for this project. You will need your Pinecone API key.
* Either Python 3.10 or later, or Node installed
To get evaluators calculated in Splunk Agent Observability, you will need:
* An integration with an LLM configured. If you don't have an integration configured, then:
In the Splunk Agent Observability UI, navigate to the **LLM Integrations** page by selecting your user profile in the upper-right corner and then selecting **Integrations**.
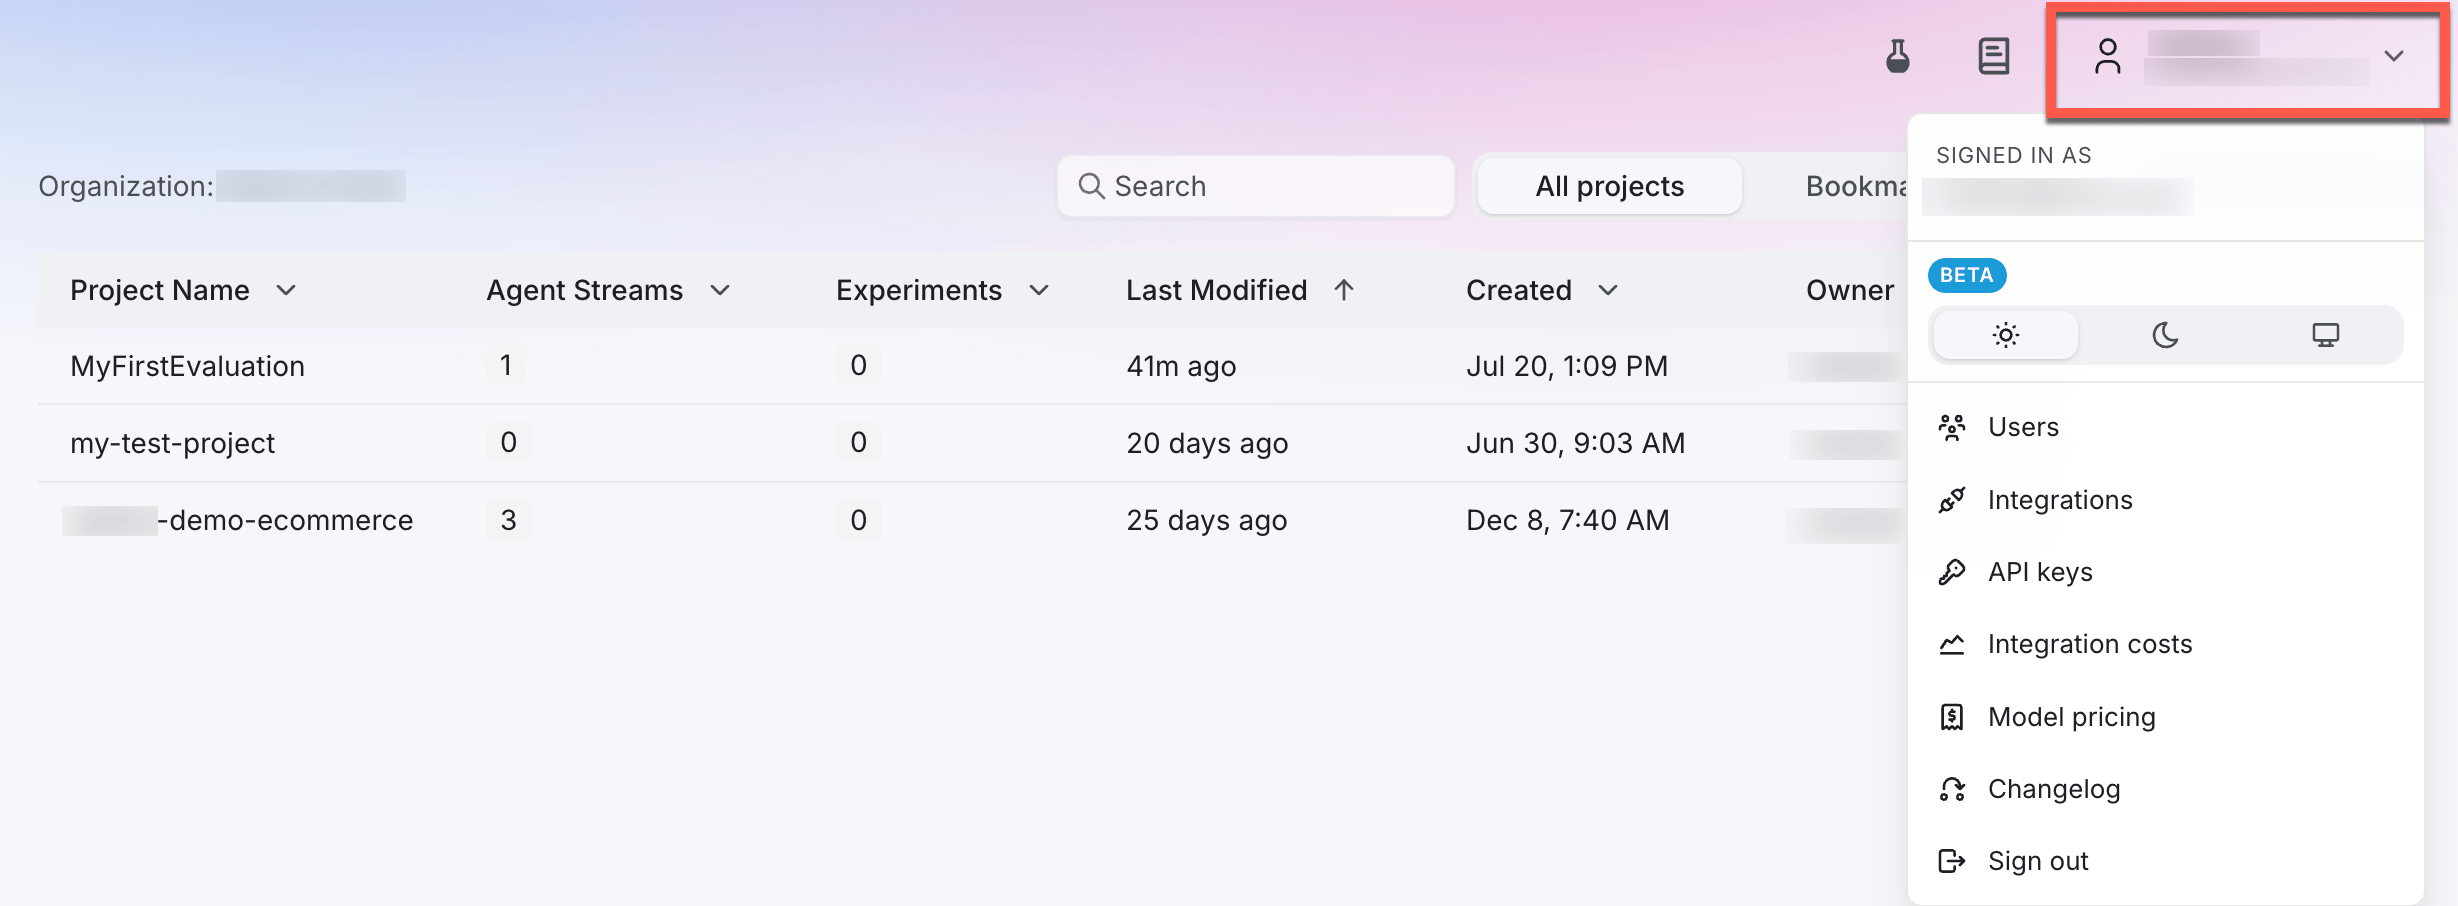 Locate the LLM provider you are using (or specify a [custom integration](/sdk-api/third-party-integrations/model-integrations/custom-model-integrations/custom-model-integrations)), then select the **+Add Integration** button.
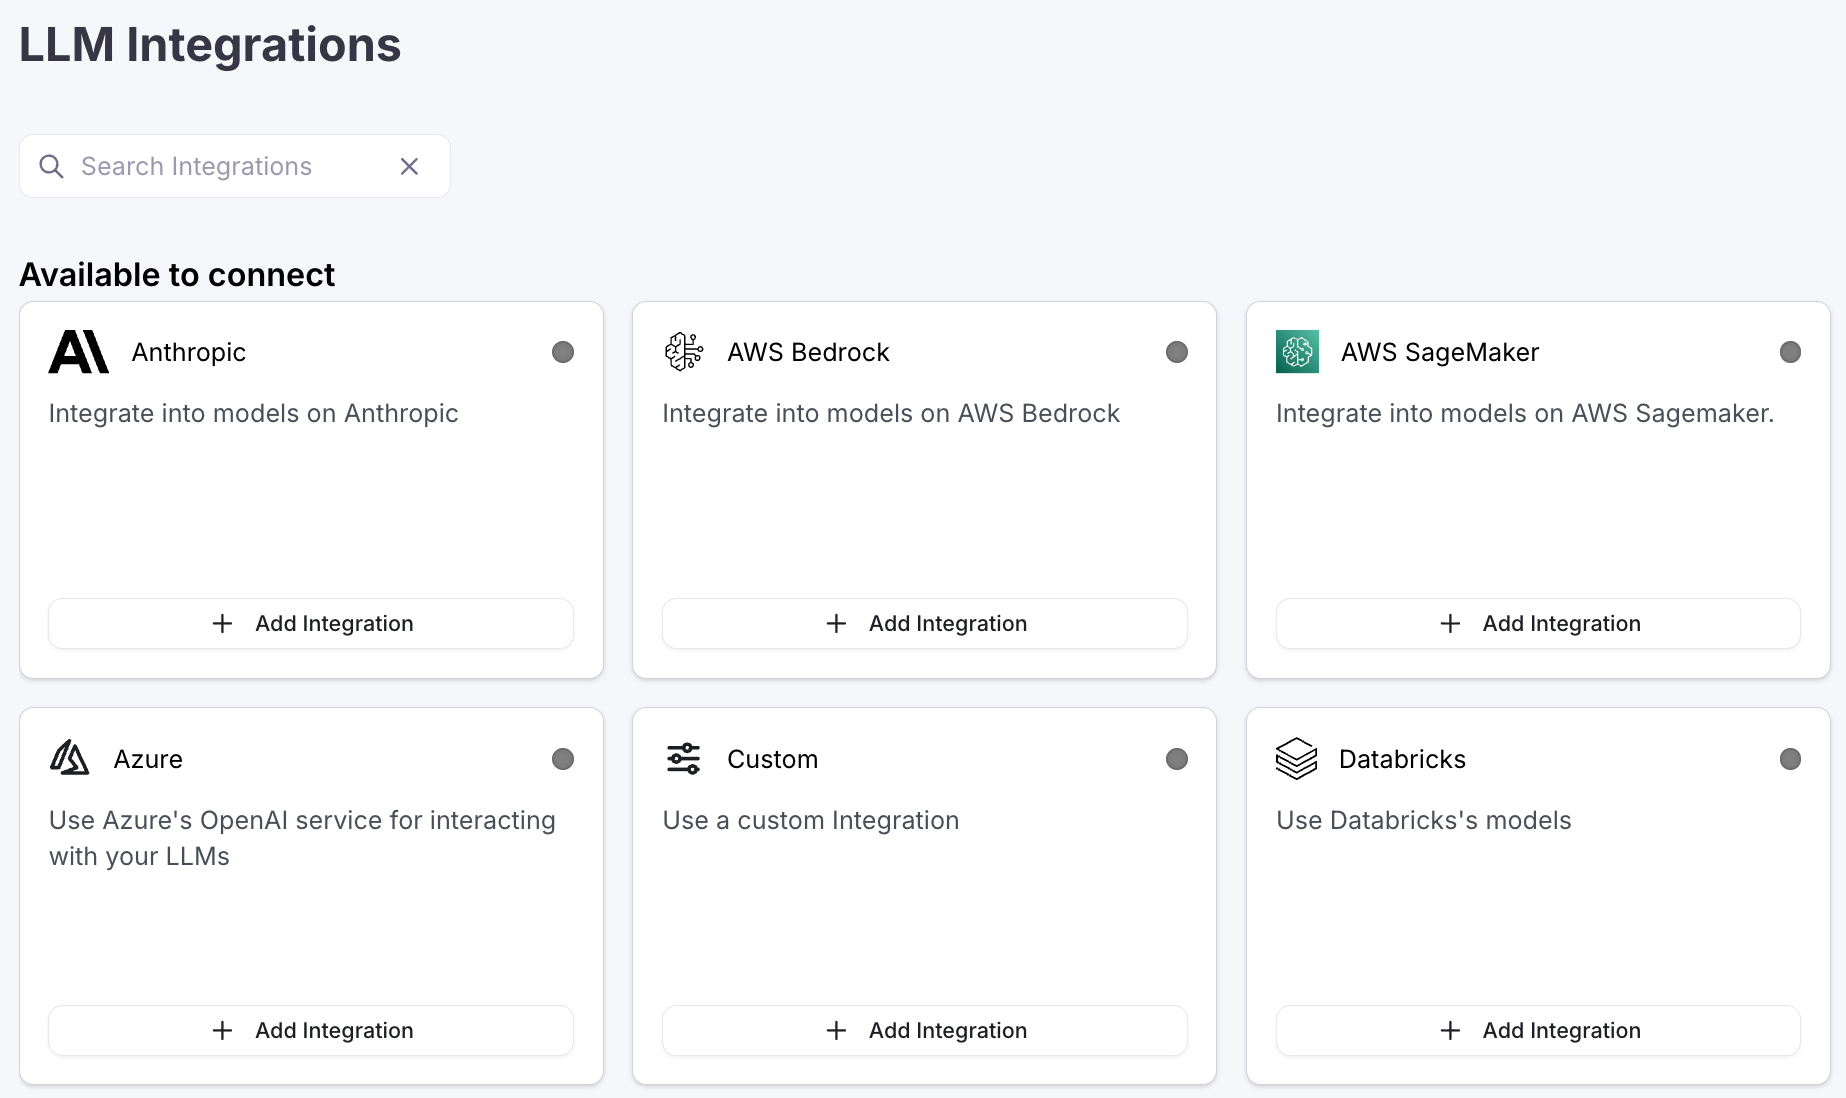 Specify settings for your integration (such as an API key), then select **Save changes**.
### Get the code
```bash Terminal theme={null}
git clone https://github.com/splunk/splunk-ao-python
```
Start by navigating to the root folder for the programming language you are using:
```bash Python theme={null}
cd examples/agent/langgraph-fsi-agent/after
```
If you want to learn more about adding logging with Splunk Agent Observability to a LangGraph app, check out the [add evaluations to a multi-agent LangGraph application cookbook](/cookbooks/use-cases/multi-agent-langgraph/multi-agent-langgraph).
The full source code for all of our sample projects is available in the Splunk Agent Observability [Python SDK Examples GitHub repo](https://github.com/splunk/splunk-ao-python/tree/main/examples).
Check out sample projects using Splunk Agent Observability
### Set up Pinecone
This project uses Pinecone as a vector database to power a RAG agent that retrieves data around the fictional credit cards offered by a bank. Before you can run the app, you will need to upload the documents.
In each project folder is a `.env.example` file. Rename this file to `.env` and populate the `PINECONE_API_KEY` value. You can leave the other values for now as you will populate them later
There is a helper script in the `scripts` folder. Run this script to create a new index in Pinecone and upload the documents.
```python Python theme={null}
python ./scripts/setup_pinecone.py
```
This will take a few seconds, and a successful run should look like:
```output Terminal theme={null}
Loading documents for credit-card-information folder...
...
✅ Document processing and upload complete!
```
### Run the code
From the project folder, Install the required dependencies. For Python, make sure to create and activate a virtual environment before installing the dependencies.
```bash Python theme={null}
pip install -r requirements.txt
```
In your `.env` file, populate the Splunk Agent Observability values:
| Environment Variable | Value |
| :----------------------- | :------------------------------------------------------------------------------------------------------------------------------------------------------------------------------------------------------------------------------------- |
| `SPLUNK_AO_API_KEY` | Only required if you are using an on-premises, standalone, or custom deployment. Your API key. |
| `SPLUNK_AO_PROJECT` | The name of your Splunk Agent Observability project - this is preset to `Multi-Agent Banking Chatbot` |
| `SPLUNK_AO_AGENT_STREAM` | The name of your Agent Stream - this is preset to `Default Agent Stream` |
| `SPLUNK_AO_CONSOLE_URL` | Only required if you are using an on-premises, standalone, or custom deployment. Your custom deployment URL, which appears in the browser when you log into Splunk Observability Cloud. For the free tier, you don't need to set this. |
You can find these values from the project page for the multi-agent banking chatbot sample page in the Splunk Agent Observability.
Next populate the values for your LLM:
| Environment Variable | Value |
| :------------------- | :----------------------------------------------------------------------------------------------------------------------------------------------------------------------------------------------------------------------------------------------------------------------- |
| `OPENAI_API_KEY` | Your OpenAI API key. If you are using Ollama, set this to `ollama`. If you are using another OpenAI compatible API, then set this to the relevant API key. |
| `OPENAI_BASE_URL` | Optional. The base URL of your OpenAI deployment. Leave this commented out if you are using the default OpenAI API. If you are using Ollama, set this to `http://localhost:11434/v1`. If you are using another OpenAI compatible API, then set this to the relevant URL. |
| `MODEL_NAME` | The name of the model you are using |
Run the project with the following command:
```bash Python theme={null}
chainlit run app.py -w
```
If you are using the Python version, the app will be running at [localhost:8000](http://localhost:8000), so open it in your browser.
You can ask the agent questions about:
* The different credit cards offered by the bank
* Your credit score
### Improve the app
The insights you viewed earlier suggested improving how the supervisor agent processes messages, especially with credit scores. You can try this out to see what issues might occur:
```output Terminal theme={null}
You: What is my credit score?
Assistant: I cannot answer that question.
```
Despite there being an agent to get the users credit score, it is not always used.
To improve the agent, have a look at the agent prompt defined in the following file:
```output Python theme={null}
src/splunk_ao_langgraph_fsi_agent/agents/supervisor_agent.py
```
In this file is the current agent prompt:
```python Python theme={null}
bank_supervisor_agent = create_supervisor(
model=ChatOpenAI(model=os.environ["MODEL_NAME"], name="Supervisor"),
agents=[credit_card_information_agent, credit_score_agent],
prompt=(
"""
You are a supervisor managing the following agents:
- a credit card information agent. Assign any tasks related to
information about credit cards to this agent
Otherwise, only respond with 'I don't know' or 'I cannot answer
that question'.
If you need to ask the user for more information, do so in a
concise manner.
"""
),
add_handoff_back_messages=True,
output_mode="full_history",
supervisor_name="brahe-bank-supervisor-agent",
).compile()
```
This supervisor agent prompt explicitly mentions the credit card agent, but not the credit score agent. You can encourage the supervisor agent to use the credit score agent to get better results:
```python Python theme={null}
"""
You are a supervisor managing the following agents:
- a credit card information agent. Assign any tasks related to
information about credit cards to this agent
- a credit score agent. Use this to get the users credit score.
Otherwise, only respond with 'I don't know' or 'I cannot answer
that question'.
If you need to ask the user for more information, do so in a
concise manner.
"""
```
Try this new prompt out and see how the agent responds.
```output Terminal theme={null}
You: what is my credit score
Assistant: Your credit score is 550. If you have any other questions or
need further assistance, please let me know.
```
Once you have asked a few questions, head back to the Splunk Agent Observability UI and examine the new traces. You should see the evaluators improving.
### Run the sample app as an experiment
Splunk Agent Observability allows you to run [experiments](/sdk-api/experiments/experiments) against [datasets](/sdk-api/experiments/datasets) of known data, generating traces in an experiment Agent Stream and evaluating these for different evaluators. Experiments allow you to take a known set of inputs and evaluate different prompts, LLMs, or versions of your apps.
This sample project has a unit test that runs the chatbot against a pre-defined dataset, containing a mixture of sensible and irrelevant questions:
```json dataset.json theme={null}
[
{"input": "What are the cashback rewards offered by the Orbit Credit Card?"},
{"input": "What is my credit score?"},
{"input": "What is the APR for balance transfers on the Orbit Credit Card?"},
{"input": "What credit cards am I eligible for?"},
{"input": "What can I do with my credit score?"},
{"input": "Recommend me a good book."}
...
]
```
You can use this unit test to evaluate different supervisor agent prompts for your app.
Use the following command to run the unit test:
```python Python theme={null}
python -m pytest test.py
```
The unit test will output a link to the experiment in the Splunk Agent Observability UI:
```output Terminal theme={null}
Experiment multi-agent-chatbot-experiment 2025-07-15 at 00:48:11.842 has
completed and results are available at
//experiments/
```
Follow this link to see the evaluators for the experiment Agent Stream.
Experiment with different supervisor agent prompts. Edit the supervisor agent prompt in the app, then re-run the experiment through the unit test to see how different supervisor agent prompts affect the evaluators.
If you navigate back to the experiments list using the breadcrumb, you can select **Compare Experiments**, then select multiple rows to [compare the experiments in detail](/concepts/experiments/compare).
## Next steps
### Logging with the SDKs
Learn how to run experiments with multiple data points using datasets and prompt templates
Log with full control over sessions, traces, and spans using the Splunk Agent Observability logger.
Quickly add logging to your code with the log decorator and wrapper.
Manage logging using the Splunk Agent Observability context manager.
### How-to guides
Learn how to integrate and use OpenAI's API with Splunk Agent Observability's wrapper client.
Specify settings for your integration (such as an API key), then select **Save changes**.
### Get the code
```bash Terminal theme={null}
git clone https://github.com/splunk/splunk-ao-python
```
Start by navigating to the root folder for the programming language you are using:
```bash Python theme={null}
cd examples/agent/langgraph-fsi-agent/after
```
If you want to learn more about adding logging with Splunk Agent Observability to a LangGraph app, check out the [add evaluations to a multi-agent LangGraph application cookbook](/cookbooks/use-cases/multi-agent-langgraph/multi-agent-langgraph).
The full source code for all of our sample projects is available in the Splunk Agent Observability [Python SDK Examples GitHub repo](https://github.com/splunk/splunk-ao-python/tree/main/examples).
Check out sample projects using Splunk Agent Observability
### Set up Pinecone
This project uses Pinecone as a vector database to power a RAG agent that retrieves data around the fictional credit cards offered by a bank. Before you can run the app, you will need to upload the documents.
In each project folder is a `.env.example` file. Rename this file to `.env` and populate the `PINECONE_API_KEY` value. You can leave the other values for now as you will populate them later
There is a helper script in the `scripts` folder. Run this script to create a new index in Pinecone and upload the documents.
```python Python theme={null}
python ./scripts/setup_pinecone.py
```
This will take a few seconds, and a successful run should look like:
```output Terminal theme={null}
Loading documents for credit-card-information folder...
...
✅ Document processing and upload complete!
```
### Run the code
From the project folder, Install the required dependencies. For Python, make sure to create and activate a virtual environment before installing the dependencies.
```bash Python theme={null}
pip install -r requirements.txt
```
In your `.env` file, populate the Splunk Agent Observability values:
| Environment Variable | Value |
| :----------------------- | :------------------------------------------------------------------------------------------------------------------------------------------------------------------------------------------------------------------------------------- |
| `SPLUNK_AO_API_KEY` | Only required if you are using an on-premises, standalone, or custom deployment. Your API key. |
| `SPLUNK_AO_PROJECT` | The name of your Splunk Agent Observability project - this is preset to `Multi-Agent Banking Chatbot` |
| `SPLUNK_AO_AGENT_STREAM` | The name of your Agent Stream - this is preset to `Default Agent Stream` |
| `SPLUNK_AO_CONSOLE_URL` | Only required if you are using an on-premises, standalone, or custom deployment. Your custom deployment URL, which appears in the browser when you log into Splunk Observability Cloud. For the free tier, you don't need to set this. |
You can find these values from the project page for the multi-agent banking chatbot sample page in the Splunk Agent Observability.
Next populate the values for your LLM:
| Environment Variable | Value |
| :------------------- | :----------------------------------------------------------------------------------------------------------------------------------------------------------------------------------------------------------------------------------------------------------------------- |
| `OPENAI_API_KEY` | Your OpenAI API key. If you are using Ollama, set this to `ollama`. If you are using another OpenAI compatible API, then set this to the relevant API key. |
| `OPENAI_BASE_URL` | Optional. The base URL of your OpenAI deployment. Leave this commented out if you are using the default OpenAI API. If you are using Ollama, set this to `http://localhost:11434/v1`. If you are using another OpenAI compatible API, then set this to the relevant URL. |
| `MODEL_NAME` | The name of the model you are using |
Run the project with the following command:
```bash Python theme={null}
chainlit run app.py -w
```
If you are using the Python version, the app will be running at [localhost:8000](http://localhost:8000), so open it in your browser.
You can ask the agent questions about:
* The different credit cards offered by the bank
* Your credit score
### Improve the app
The insights you viewed earlier suggested improving how the supervisor agent processes messages, especially with credit scores. You can try this out to see what issues might occur:
```output Terminal theme={null}
You: What is my credit score?
Assistant: I cannot answer that question.
```
Despite there being an agent to get the users credit score, it is not always used.
To improve the agent, have a look at the agent prompt defined in the following file:
```output Python theme={null}
src/splunk_ao_langgraph_fsi_agent/agents/supervisor_agent.py
```
In this file is the current agent prompt:
```python Python theme={null}
bank_supervisor_agent = create_supervisor(
model=ChatOpenAI(model=os.environ["MODEL_NAME"], name="Supervisor"),
agents=[credit_card_information_agent, credit_score_agent],
prompt=(
"""
You are a supervisor managing the following agents:
- a credit card information agent. Assign any tasks related to
information about credit cards to this agent
Otherwise, only respond with 'I don't know' or 'I cannot answer
that question'.
If you need to ask the user for more information, do so in a
concise manner.
"""
),
add_handoff_back_messages=True,
output_mode="full_history",
supervisor_name="brahe-bank-supervisor-agent",
).compile()
```
This supervisor agent prompt explicitly mentions the credit card agent, but not the credit score agent. You can encourage the supervisor agent to use the credit score agent to get better results:
```python Python theme={null}
"""
You are a supervisor managing the following agents:
- a credit card information agent. Assign any tasks related to
information about credit cards to this agent
- a credit score agent. Use this to get the users credit score.
Otherwise, only respond with 'I don't know' or 'I cannot answer
that question'.
If you need to ask the user for more information, do so in a
concise manner.
"""
```
Try this new prompt out and see how the agent responds.
```output Terminal theme={null}
You: what is my credit score
Assistant: Your credit score is 550. If you have any other questions or
need further assistance, please let me know.
```
Once you have asked a few questions, head back to the Splunk Agent Observability UI and examine the new traces. You should see the evaluators improving.
### Run the sample app as an experiment
Splunk Agent Observability allows you to run [experiments](/sdk-api/experiments/experiments) against [datasets](/sdk-api/experiments/datasets) of known data, generating traces in an experiment Agent Stream and evaluating these for different evaluators. Experiments allow you to take a known set of inputs and evaluate different prompts, LLMs, or versions of your apps.
This sample project has a unit test that runs the chatbot against a pre-defined dataset, containing a mixture of sensible and irrelevant questions:
```json dataset.json theme={null}
[
{"input": "What are the cashback rewards offered by the Orbit Credit Card?"},
{"input": "What is my credit score?"},
{"input": "What is the APR for balance transfers on the Orbit Credit Card?"},
{"input": "What credit cards am I eligible for?"},
{"input": "What can I do with my credit score?"},
{"input": "Recommend me a good book."}
...
]
```
You can use this unit test to evaluate different supervisor agent prompts for your app.
Use the following command to run the unit test:
```python Python theme={null}
python -m pytest test.py
```
The unit test will output a link to the experiment in the Splunk Agent Observability UI:
```output Terminal theme={null}
Experiment multi-agent-chatbot-experiment 2025-07-15 at 00:48:11.842 has
completed and results are available at
//experiments/
```
Follow this link to see the evaluators for the experiment Agent Stream.
Experiment with different supervisor agent prompts. Edit the supervisor agent prompt in the app, then re-run the experiment through the unit test to see how different supervisor agent prompts affect the evaluators.
If you navigate back to the experiments list using the breadcrumb, you can select **Compare Experiments**, then select multiple rows to [compare the experiments in detail](/concepts/experiments/compare).
## Next steps
### Logging with the SDKs
Learn how to run experiments with multiple data points using datasets and prompt templates
Log with full control over sessions, traces, and spans using the Splunk Agent Observability logger.
Quickly add logging to your code with the log decorator and wrapper.
Manage logging using the Splunk Agent Observability context manager.
### How-to guides
Learn how to integrate and use OpenAI's API with Splunk Agent Observability's wrapper client.
**Python**
Learn how to use the Splunk Agent Observability @log decorator to log functions to traces
**Python**
Learn how to create log traces and spans manually in your AI apps
**Python**
### SDK reference
The Splunk Agent Observability Python SDK reference.