

Get the code
Get the code for the sample project. You can find this project by cloning the Splunk Agent Observability Python SDK repo.The code for this project is in the
/examples/agent/langgraph-fsi-agent/after folder.Evaluate the app
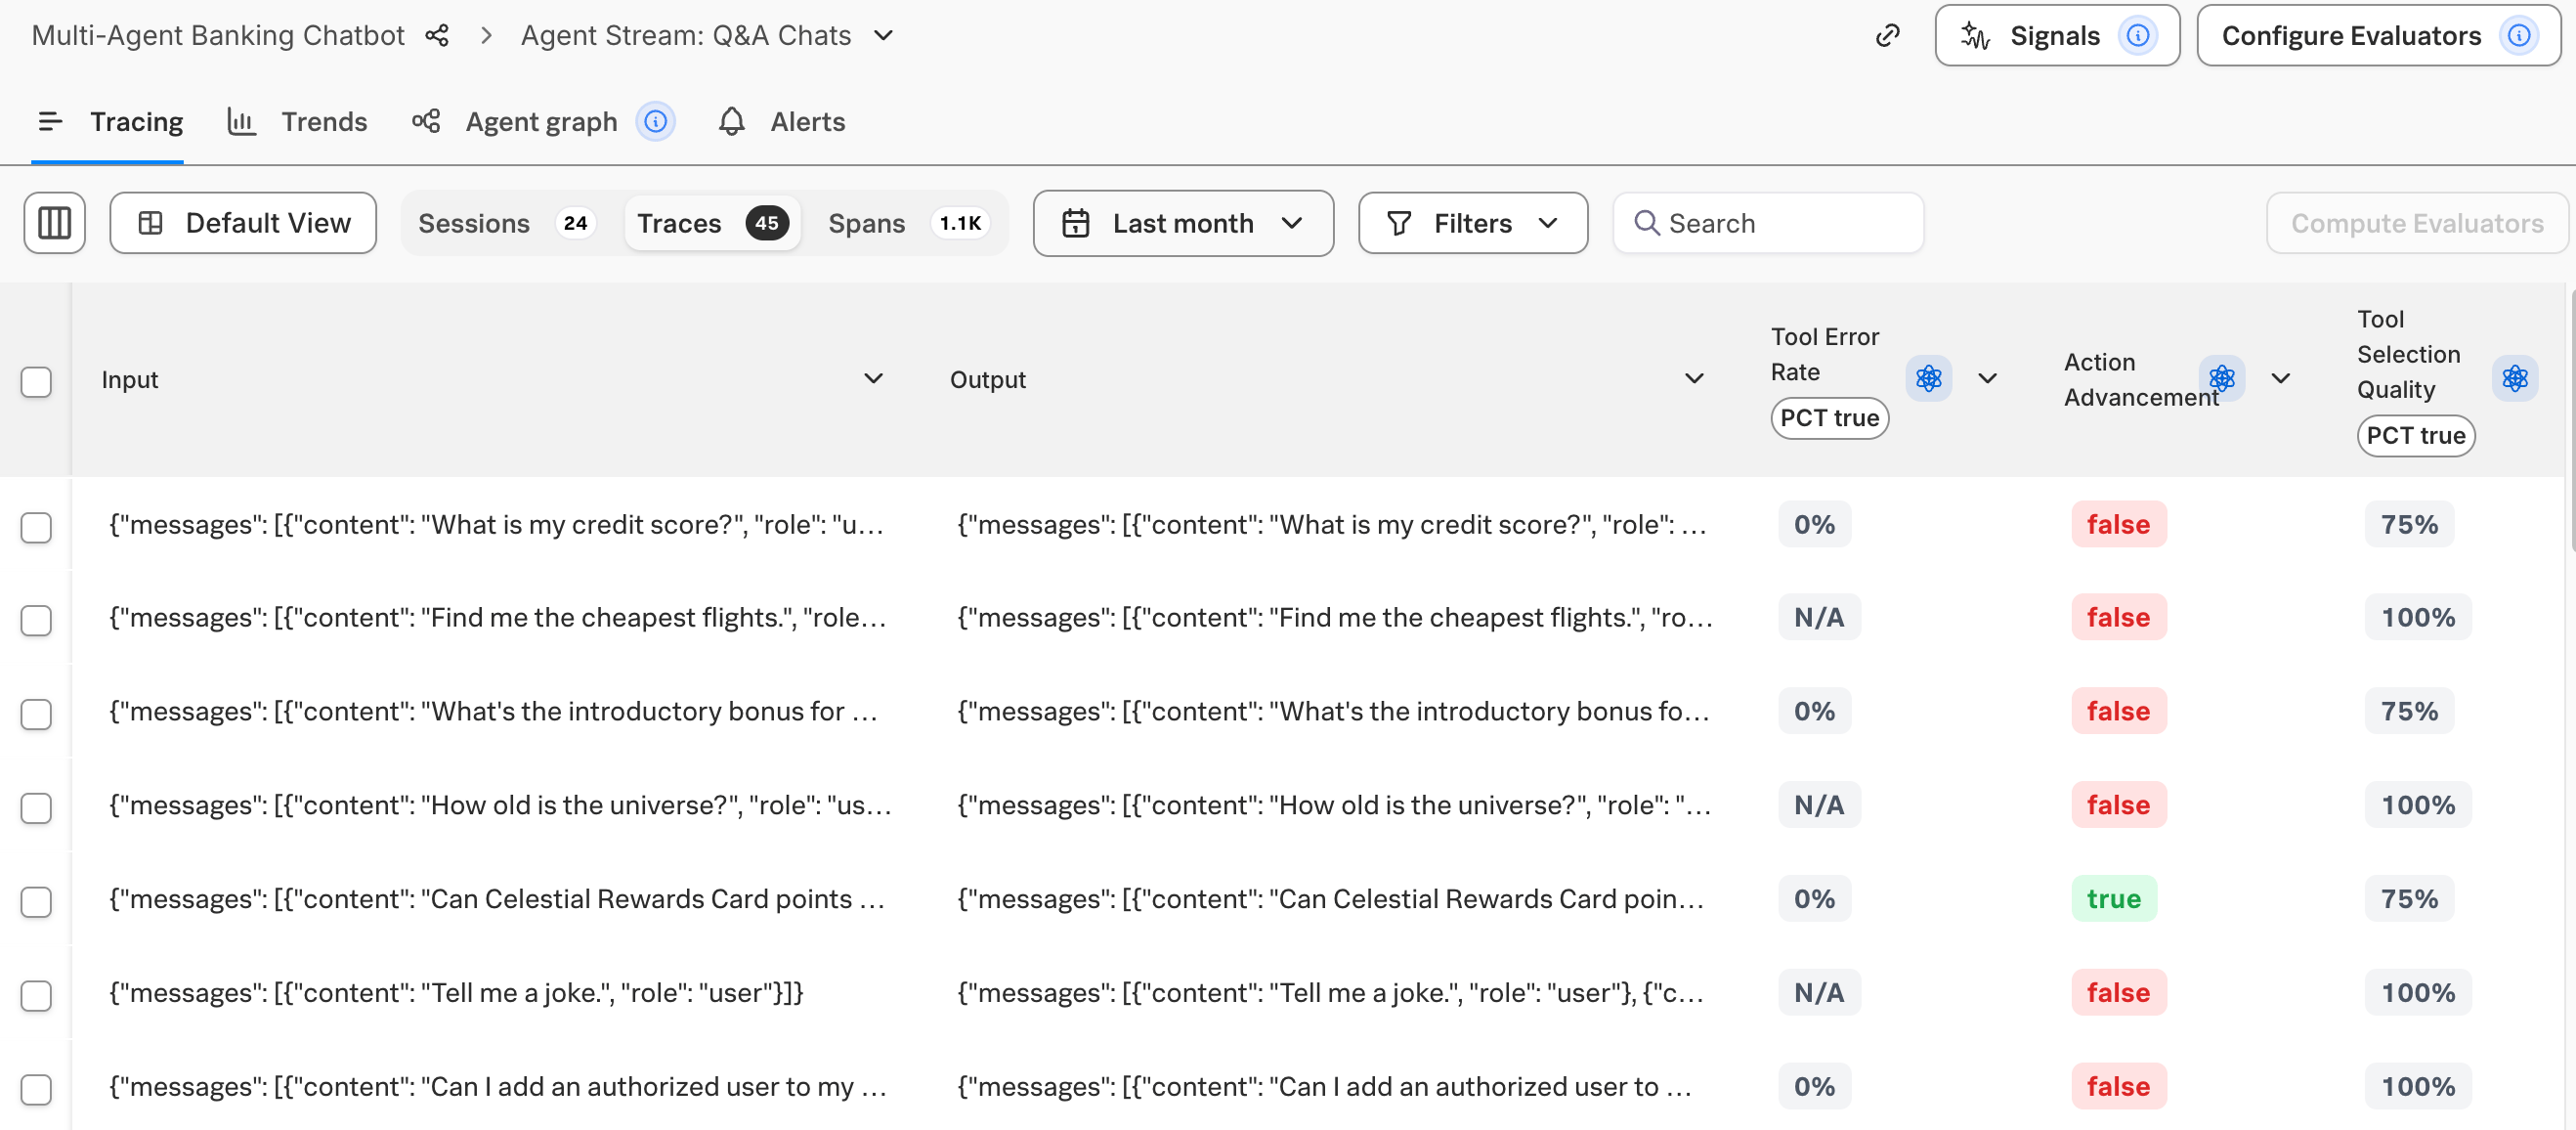
The sample project comes with an Agent Stream pre-populated with a set of traces for some sample interactions with the chatbot - some asking relevant questions, some asking questions unrelated to the banking agents capabilities.Investigate the Agent Stream
- On-premises
- SaaS
From the Splunk Agent Observability main menu, select Project > Multi-Agent Banking Chatbot. Select the Default Agent Stream.The Agent Stream is configured with the following evaluators:For some of the traces, these evaluators are scored at 100%, showing the agents are working well for those inputs. For other traces, these evaluators are reporting lower values, showing the chatbot needs some improvements.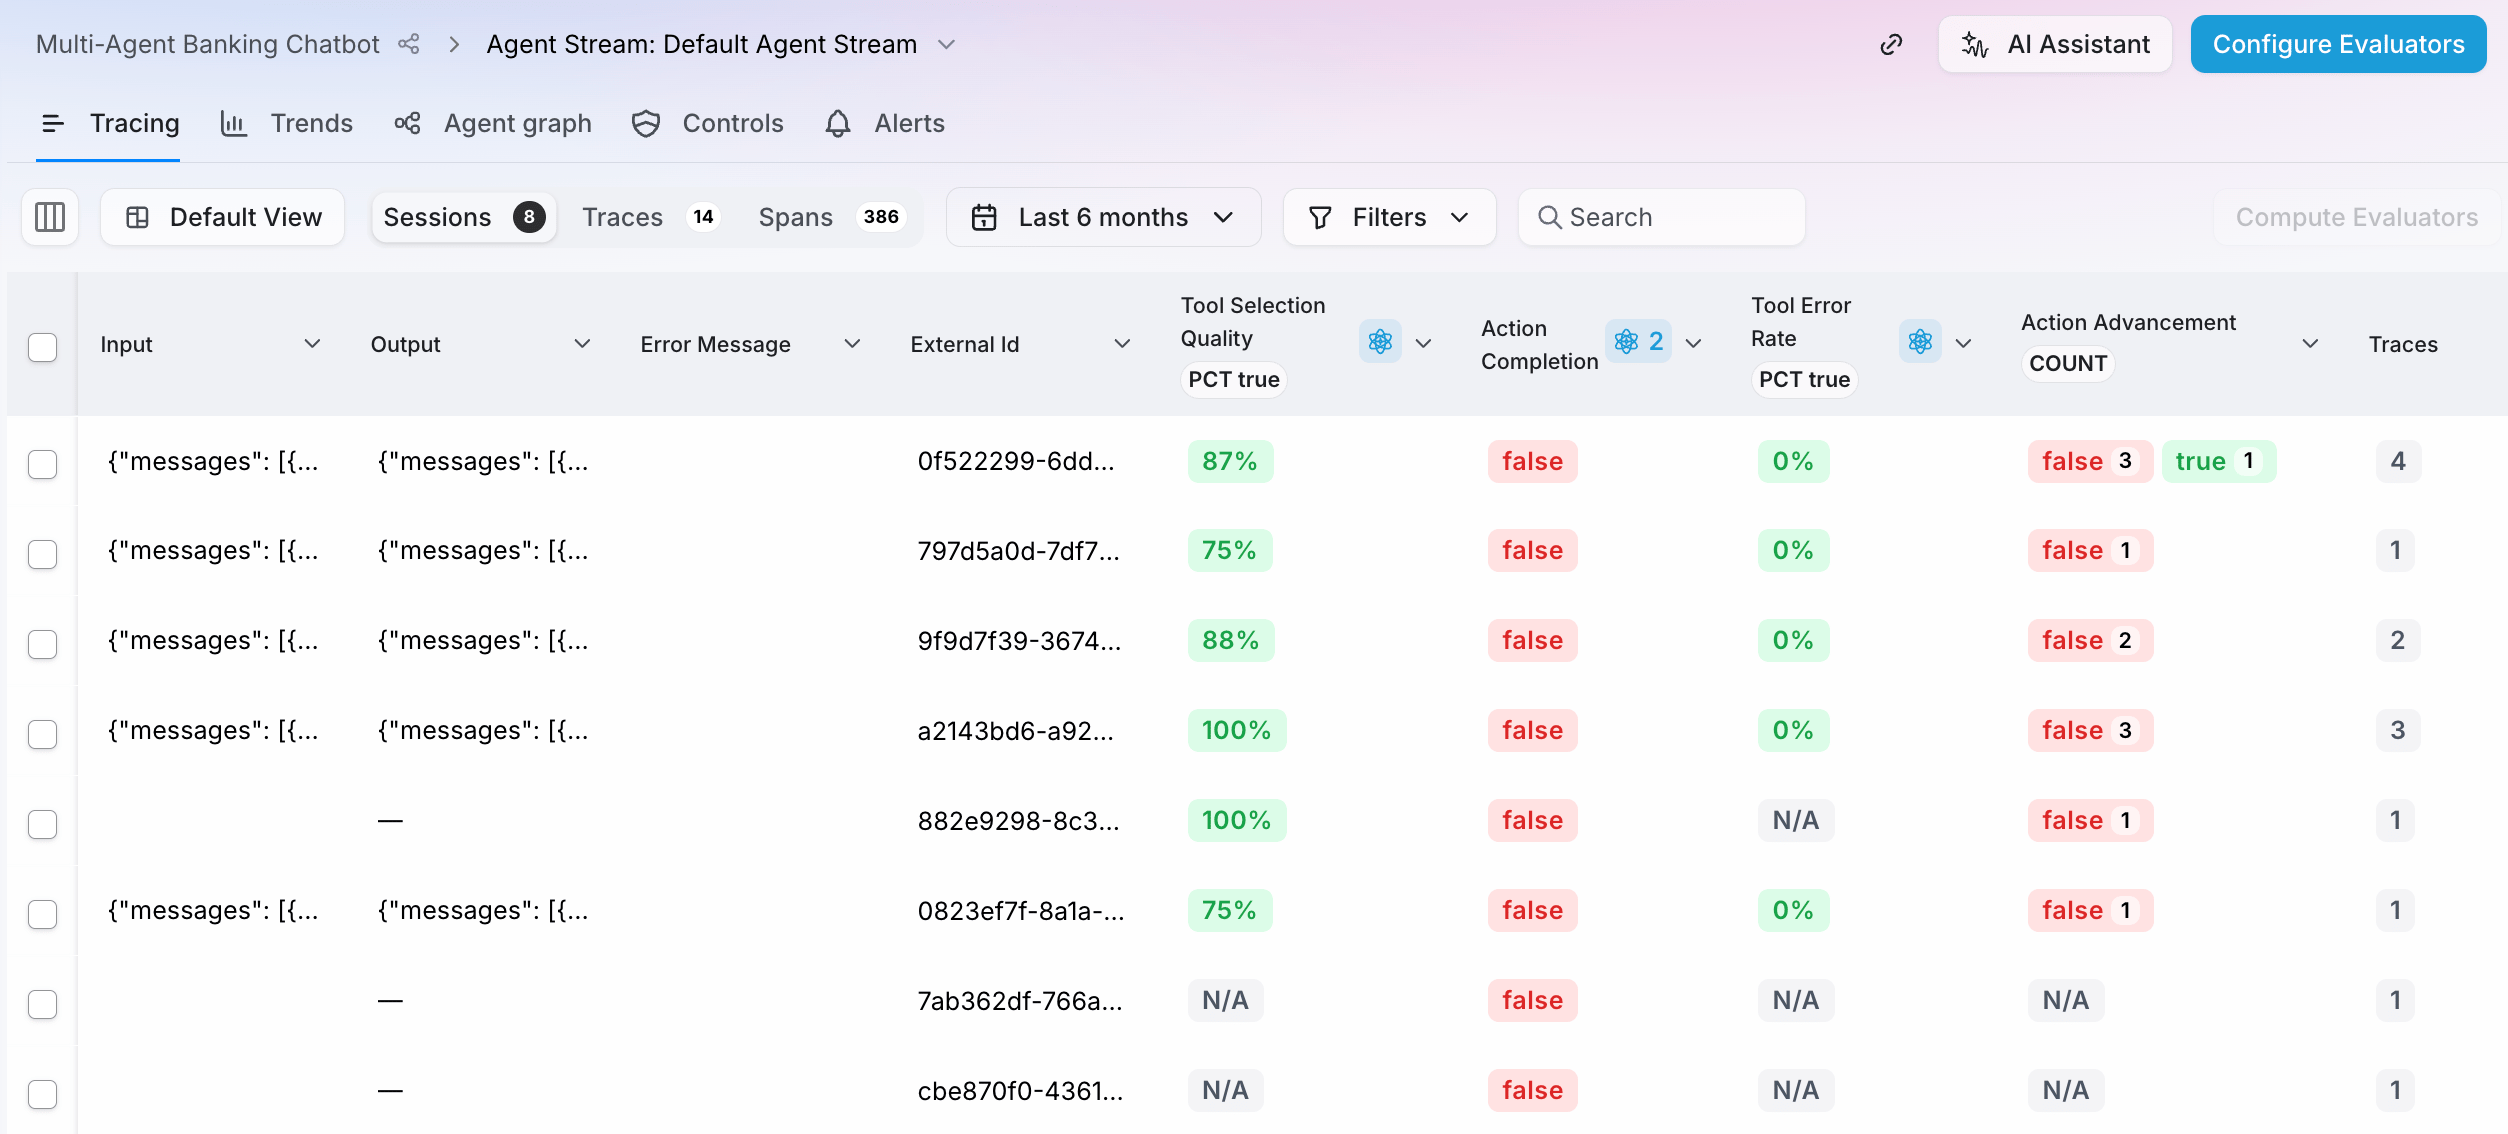
Run the sample app
You can run the sample app to generate more traces, and test out different agent prompts.Prerequisites
To run the code yourself to generate more traces, you will need:- Access to an OpenAI compatible API, such as
- An OpenAI API key
- Access to an OpenAI compatible API, such as Google Vertex
- Ollama installed locally with a model downloaded
- A Pinecone account. The free Starter tier is more than enough for this project. You will need your Pinecone API key.
- Either Python 3.10 or later, or Node installed
-
An integration with an LLM configured. If you don’t have an integration configured, then:
- On-premises
- SaaS
1Navigate to the Integrations page
In the Splunk Agent Observability UI, select your user profile in the upper-right corner and then select Integrations.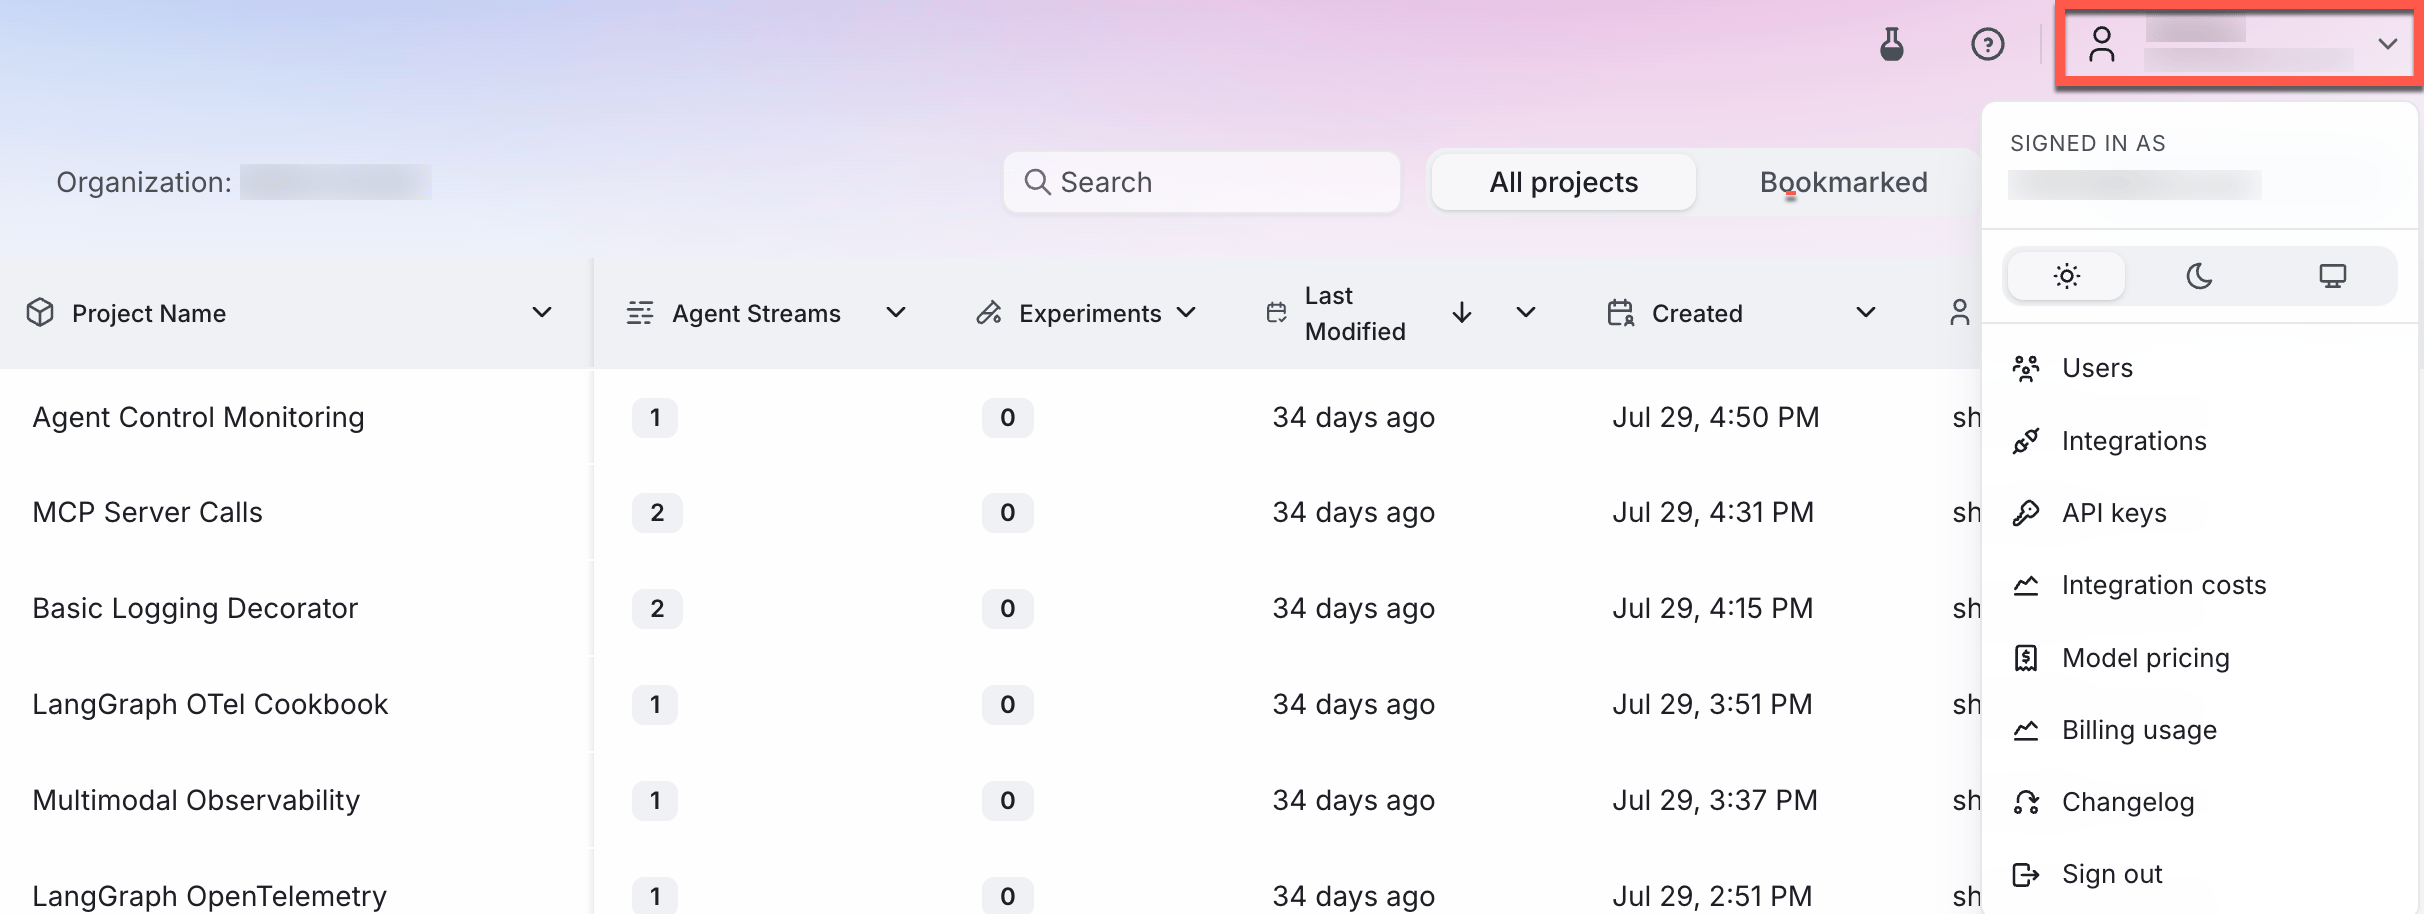 2
2Add an integration
Locate the LLM provider you are using (or specify a custom integration), then select the +Add Integration button.3Add settings
Specify settings for your integration (such as an API key), then select Save changes.
Get the code
1
Clone the SDK examples repo
Terminal
2
Navigate to the relevant project folder
Start by navigating to the root folder for the programming language you are using:
If you want to learn more about adding logging with Splunk Agent Observability to a LangGraph app, check out the add evaluations to a multi-agent LangGraph application cookbook.
SDK Examples
Check out sample projects using Splunk Agent Observability
Set up Pinecone
This project uses Pinecone as a vector database to power a RAG agent that retrieves data around the fictional credit cards offered by a bank. Before you can run the app, you will need to upload the documents.1
Configure environment variables
In each project folder is a
.env.example file. Rename this file to .env and populate the PINECONE_API_KEY value. You can leave the other values for now as you will populate them later2
Upload the documents
There is a helper script in the This will take a few seconds, and a successful run should look like:
scripts folder. Run this script to create a new index in Pinecone and upload the documents.Terminal
Run the code
1
Install required dependencies
From the project folder, Install the required dependencies. For Python, make sure to create and activate a virtual environment before installing the dependencies.
2
Configure environment variables
In your Next populate the values for your LLM:
.env file, populate the Splunk Agent Observability values.Environment variables vary depending on your deployment type. For details, see the on-premises and SaaS environment variable references.You can find these values from the project page for the multi-agent banking chatbot sample page in the Splunk Agent Observability.
3
Run the project
Run the project with the following command:If you are using the Python version, the app will be running at localhost:8000, so open it in your browser.You can ask the agent questions about:
- The different credit cards offered by the bank
- Your credit score
Improve the app
The insights you viewed earlier suggested improving how the supervisor agent processes messages, especially with credit scores. You can try this out to see what issues might occur:Terminal
Terminal
Run the sample app as an experiment
Splunk Agent Observability allows you to run experiments against datasets of known data, generating traces in an experiment Agent Stream and evaluating these for different evaluators. Experiments allow you to take a known set of inputs and evaluate different prompts, LLMs, or versions of your apps. This sample project has a unit test that runs the chatbot against a pre-defined dataset, containing a mixture of sensible and irrelevant questions:dataset.json
1
Run the unit test
Use the following command to run the unit test:
2
Evaluate the experiment
The unit test will output a link to the experiment in the Splunk Agent Observability UI:Follow this link to see the evaluators for the experiment Agent Stream.
Terminal
3
Try different supervisor agent prompts
Experiment with different supervisor agent prompts. Edit the supervisor agent prompt in the app, then re-run the experiment through the unit test to see how different supervisor agent prompts affect the evaluators.
4
Compare experiments
If you navigate back to the experiments list using the breadcrumb, you can select Compare Experiments, then select multiple rows to compare the experiments in detail.
Next steps
Logging with the SDKs
Learn how to log experiments
Learn how to run experiments with multiple data points using datasets and prompt templates
Splunk Agent Observability logger
Log with full control over sessions, traces, and spans using the Splunk Agent Observability logger.
Log decorator
Quickly add logging to your code with the log decorator and wrapper.
Splunk Agent Observability context
Manage logging using the Splunk Agent Observability context manager.
How-to guides
Log Using the OpenAI Wrapper
Learn how to integrate and use OpenAI’s API with Splunk Agent Observability’s wrapper client.
Python
Python
Log Using the @log Decorator
Learn how to use the Splunk Agent Observability @log decorator to log functions to traces
Python
Python
Create Traces and Spans
Learn how to create log traces and spans manually in your AI apps
Python
Python
SDK reference
Python SDK Reference
The Splunk Agent Observability Python SDK reference.